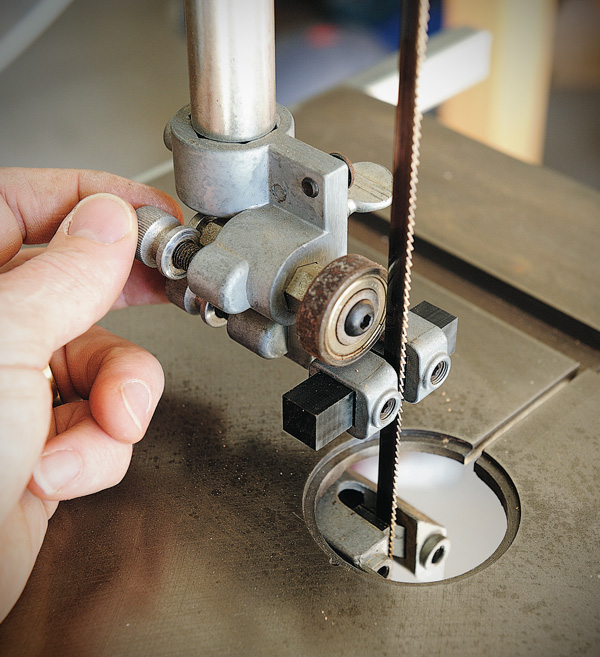
Whether you’ve purchased a new bandsaw, or are simply changing the blade on your old one, spend a little time making sure all the adjustable parts of the saw are correctly aligned.
To begin with, make sure the machine is turned off and unplugged before you attempt to make any adjustments to your saw. Open the wheel covers. If you are changing the blade, remove the blade- guard, move the guide blocks or bearings out of the way and remove the throat plate and table pin, loosen the tension on the wheels and remove the old blade, then fit the new one onto the wheels.

Add enough tension to hold it in place and turn the wheel by hand anti-clockwise to make sure the blade isn’t in contact with any metal. If it’s clear increase the tension until the blade can only move side to side about 6mm from its vertical position. If it’s too tight it will lead to the blade wearing too quickly and put unnecessary strain on the frame and tyres, too loose and the blade will wander all over the place as it cuts. Replace the blade cover, throat plate and table pin.
Turn the wheel again by hand, this time clockwise so the blade runs forward. Check the position of the blade on the top wheel. It should sit at the top of the camber in the centre of the wheel. It’s the position of the blade on the top wheel that is important, if it rides a bit far forward or back on the bottom wheel don’t worry. When you’re happy that the blade won’t work its way off when the machine is running, the fine adjustment of the tracking can be done with the machine turned on.

Close the lower wheel cover completely and the top one a little so you can still observe the blade on the wheel. turn the saw on and off quickly and observe the travel of the blade as it slows down, if the blade is running evenly on the wheel, you can turn it on and leave it running while you adjust the tracking to get the blade sitting where you want it. On most bandsaws only a slight turn of the tilt knob is necessary to move the position of the blade. To move it towards the front of the wheel, tilt the blade forward. If you are having a lot of trouble with the tracking, it may indicate your blade is not straight or the wheels are out of alignment. If the blade is crooked it will appear to move back and forth as it turns.
If you need to check the alignment, hold a straight-edge against both wheels and tilt the top wheel until it’s vertical. The top and bottom of each wheel should touch the straight-edge. If this isn’t the case you will need to adjust your upper wheel. (Check the manual of your particular saw for instructions on how this is done).
Once the tracking is set, close and lock the top wheel cover and check all safety features on your saw are in place.
The next step is to set up the top guide blocks or bearings. These guides are designed to keep the blade cutting straight and not twisting or wandering in the cut. It’s important to check that the guides are square to the blade. You don’t want the guides to touch the blade but they should be very close. Line them up to the back of the gullet to ensure the teeth are clear. The thrust bearing sits just behind the blade but doesn’t touch it either. The bearing should only spin when the blade is under load. Repeat the same set-up with the bottom guides. Make sure all locking screws are tightened.

To produce accurate joinery you will need to check that the blade is running square to the table. The table-tilt adjustment is underneath the table. Take the throat plate out and raise the blade guard, use an engineer’s square to check the table is at 90° to the blade. Don’t always trust the gauge on the table-tilt mechanism - check it for yourself.
Finally, it’s a good idea to check your rip fence. Use your mitre gauge slot as a reference point. Most are on the right side of the blade, so switch your fence over and line it up with the edge of slot. If the line of the fence doesn’t follow the edge of the mitre slot, adjust your fence accordingly.
After the initial set-up and once your bandsaw is working well, there are no limits to how valuable it can be for all kinds of woodworking projects.
Shop our full range of Bandsaws here.
|