My Store:
Change Store
My Store:
Change Store

  • Article

Following is a list of articles. Click the 'View' button to see the detail of the article.

Return to Article List


Some Basics In Designing A Segmented Bowl Part 1
This type of design allows for various patterns to be created from unique and interesting timbers. It is also a way to use timber from boards and those odd pieces you just don’t want to throw out.

In this form of turning, segments are cut from a variety of woods, glued into the shape of a bowl, and turned on a lathe.

No two bowls are alike because of the size of the segments, types of wood, and the fact that each one is turned free-hand.

The design of the vessel and timber used is important for the final look of the vessel and understanding the basic concept of designing a segmented vessel is a good background to have, even if you design with software.

Software such as Segment Project Planner or similar assists with segmented project design. This software simplifies the design and cutting procedures. However, the design may be calculated manually without the use of software, but it is a time-consuming process.

More on the software another time, for now we will design a bowl using the basics.

Material and equipment required:
  • Graphic paper and pencil. The graphic paper makes it easier but not essential
  • Drop saw, or Table saw; or Bandsaw
  • A quality mitre gauge
  • Timber suitable for turning ripped to the height of the layers in the project
  • Large rubber bands or hose clamps (rubber bands available from Officeworks)
  • Disc and drum sanders are also handy
  • Lathe and turning tools including but not limited to, bowl gouges and scrappers
  • Sand paper 80 through to at least 400 grit
  • You desired finish

Here is the process:

1. Draw up your design on the graph paper
Basics in Designing a Segmented Bowl - Draw up your design

2. Now there is some Maths involved.

  • For each layer, measure the diameter at the widest part of that layer from your drawing. For example, in my drawing the widest part of layer 10 is the top of the layer but for layer 1 it is the bottom. Layer 10 diameter is 170 mm
  • Calculate the circumference (Pye x Dia), 3.14 x 170= 533.8
  • Now divide that by the number of segments you wish for the layer. I suggest 12 per layer to start – see the details in the box below.
    533.8 div 12 = 44.48 so call it 45 mm for the segment length.
    Basics in Designing a Segmented Bowl - calculations

How many segments per layer?

The number of segments affect the angle you cut the board so they form a circle.
I suggest 12 segments is an easy number to work with.
To calculate the angle divide the number of segments into 360deg.
Therefore 360 dive 12 = 30 But you will be cutting both sides of the segment so divide by 2. 
The cut angle for 12 segments per layer is 15 deg. An angle most saw can cut accurately

3. Now you have the length of a segment you can calculate the length of the board for the layer. The actual length is affected by whether you are trying to match a gain pattern across the segments. If there isn’t a distinct gain the effect of random pieces can look very attractive. If in doubt, draw it on the graph paper as shown below.

  • Formula for gain matching is: length of segment plus kerf of blade x number of segments.
    Therefore (45+2) X 12 = 564 mm but add some for holding the board so make it at least 580 mm

    Layout for Grain Matching - Layer 10
    Basics in Designing a Segmented Bowl - Layout for Grain Matching
    Designing A Segmented Bowl - Gain Pattern Across The Segment Join
  • When grain matching is not required less material is needed however it is also harder to calculate. So draw it on the graph paper as shown
    below and measure the length of, say, 4 segments. Here it is 165 mm and so my board needs to be at least 495 mm. About 70 mm shortest than grain matching.

    Layout without Grain Matching - Layer 10
    Designing A Segmented Bowl - Layout without Grain Matching
    Diverse pattern due to random non-grain matching
    Designing A Segmented Bowl - Random Non-Grain-Matching

4. How wide does the board need to be? 

  • From our graph paper drawing the width would
  • From our graph paper drawing the width would be 25 mm, however this doesn’t consider the curvature of the bowl.
  • The diagram below is a representation of looking down on the bowl.
  • If the segments where cut based on the details from the side drawing of the bowl the turned result would be the blue line and the possibility of not getting the shape because the wall thickness is no longer 25 mm.
    Designing A Segmented Bowl - How Wide Does The Board Need To Be

5. Still working on Layer 10 from my example, now you have a board 32 mm wide, 12 mm thick and at least 495 mm long for a non grain matched layer. It is now time to cut the segments but I suggest that if this is your first attempt at this work you use some scrap timber as a trial.

  • Setting your mitre to 15 deg
  • Set a stop so that you can repeat cuts with an edge length of 45 mm
  • Cut 12 pieces
  • Dry fit the piece to test that they make a circle with no gaps in the joins. Refer to the Appendix of this document on the method of adjusting the saw angle to get no gaps.

Here are two methods of joining the pieces into a circle:

Method 1

Lay masking tape on a flat board such as Melamine with another board at the edge. Then place the piece long side down on the tape with each piece just butting to its neighbour and against the board.

Once the pieces are down bring the ends of the marking tape around to make the circle.
Designing A Segmented Bowl - Joining The Pieces Into A Circle - Method 1

Method 2


For this method I have a Melamine board with holes to take nails and/or dowelling pegs. A rubber band can then be used as the ‘clamp’ by releasing from the rubber band.
Designing A Segmented Bowl - Joining The Pieces Into A Circle - Method 2

6. Glue up for Method 1 is to apply glue to each surface, but not the ends nor the middle. Note the tape to remind me not to put glue in the middle segments.
Designing A Segmented Bowl - Glue Up Method

For Method 2 the glue is again applied to each surface except between segments 1 and 6.

I use Titebond 3 for gluing close segment work due it’s longer work time.
Designing A Segmented Bowl - Glue Process

7. When dry, glue the 2 halves together.

Assembling the Bowl

1. Repeat the above for the other layers
2. Sand the layer flat. A disc sander or belt sander are great for this.

Designing A Segmented Bowl - Assembling The Bowl 1
3. I usually mount the bottom layer centreed on a Faceplate with a piece of pine even if the bottom layer is a solid piece – no segments.
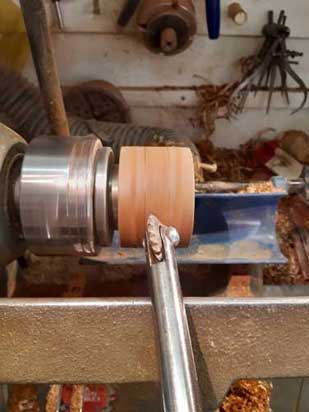
4. After gluing a layer, I place it on the lathe and sand the surface using a piece of hardware board with 180 grit sandpaper. This ensures the layer is flat and ready for the next layer.

Lathe speed I use for sanding is 800 rpm.

Designing A Segmented Bowl - Assembling The Bowl 2

5. After mounting about 3 or 4 layers turn the bowl to start developing the desired shape. Lathe speed for turning is about 1200 rpm.

Where to from here

Hopeful this hasn’t been too complicated and daunting and you want to have a go. Well a suggesting is to try just a single ring as a project.

This photo shows a single segments ring with 12 segments from 2 different timbers (Silky Oak and Camphor Laurel). It was turned by fixing to MDF with double sided tape to turn the top, inside and out and then reversed into Cole Jaws gripping the inside to finish the bottom.

Designing A Segmented Bowl - Where To From Here

Multiple coats of Polyurethane are applied to the inside to waterproof it.

This functional piece is used as a table arranger to cut flowers.

Next time I’ll explain the basic of the ‘Segmented Project Planner’ software in Some Basics in Designing a Segmented Bowl – Part 2

Allan Short

I can be contacted at:

ashort@carbatec.com.au or
alswoodturning@gmail.com

See samples of my work at Als Woodturning Creations

Appendix – How to adjust the saw angle to remove join gaps

I’m again using the example of a 12 piece segment that has been cut from scrap Pine to test the accuracy of the 15deg
1. If your test piece has gaps on the inside, decrease the angle of the cut and make another test ring.
Designing A Segmented Bowl - Appendix 1
2. If your test piece has gaps on the outside, increase the angle of the cut and make another test ring

Designing A Segmented Bowl - Appendix 2
3. Repeat the above until no light can be seen between the joins.